I’ll Take a Pass

As I have made clear before, I am not an extreme athlete. Skiing to me is not about big, steep lines. It is about exploring beautiful places in the snow. My friend Jonathan and I like to try to get out every spring to find relatively moderate ski tours to some of these places. Often the snow is warm and mushy; the approaches can be ugly – like the time we ended up hiking over 3 miles with our skis on our backs when a boulder blocked the Hart’s Pass road short of the normal closure. Somehow, perhaps because of these things rather than in spite of them, I find them to be hugely rewarding.

I want to explore the Blewett Pass area more, and after consulting maps and Google Earth, I identified a potential tour. I knew it was late in the year for that area, but we kept a flexible agenda for the weekend, so we left Seattle Friday after traffic cleared out and headed up to Blewett Pass to find out if there was any good skiing left. We coaxed Jonathan’s Mazda up Tronsen Meadow Road until it was barricaded at about 4300ft, not far from the trailhead for Tronsen Ridge (#1205). The north slopes of Diamond Head and Windy Knob were still holding some snow, but it didn’t look great, and it was obvious we wouldn’t hit any snow on our trail until at least the ridge, so we decided to just hike.

We found only a very faint trail where it was indicated on the 2016 USFS map. It was obvious it hadn’t been used in a very long time, but the terrain was pretty open, it was a beautiful afternoon and we decided to head up anyway. After gaining a couple hundred feet we intersected a well-used trail. With no other trails marked on the  and figured maybe the trail had been relocated at some point. We followed it up to the ridge where we finally found some snow.

2017-05-19 13.27.49

North side of Windy Knob, near Diamond Head at Blewett Pass.

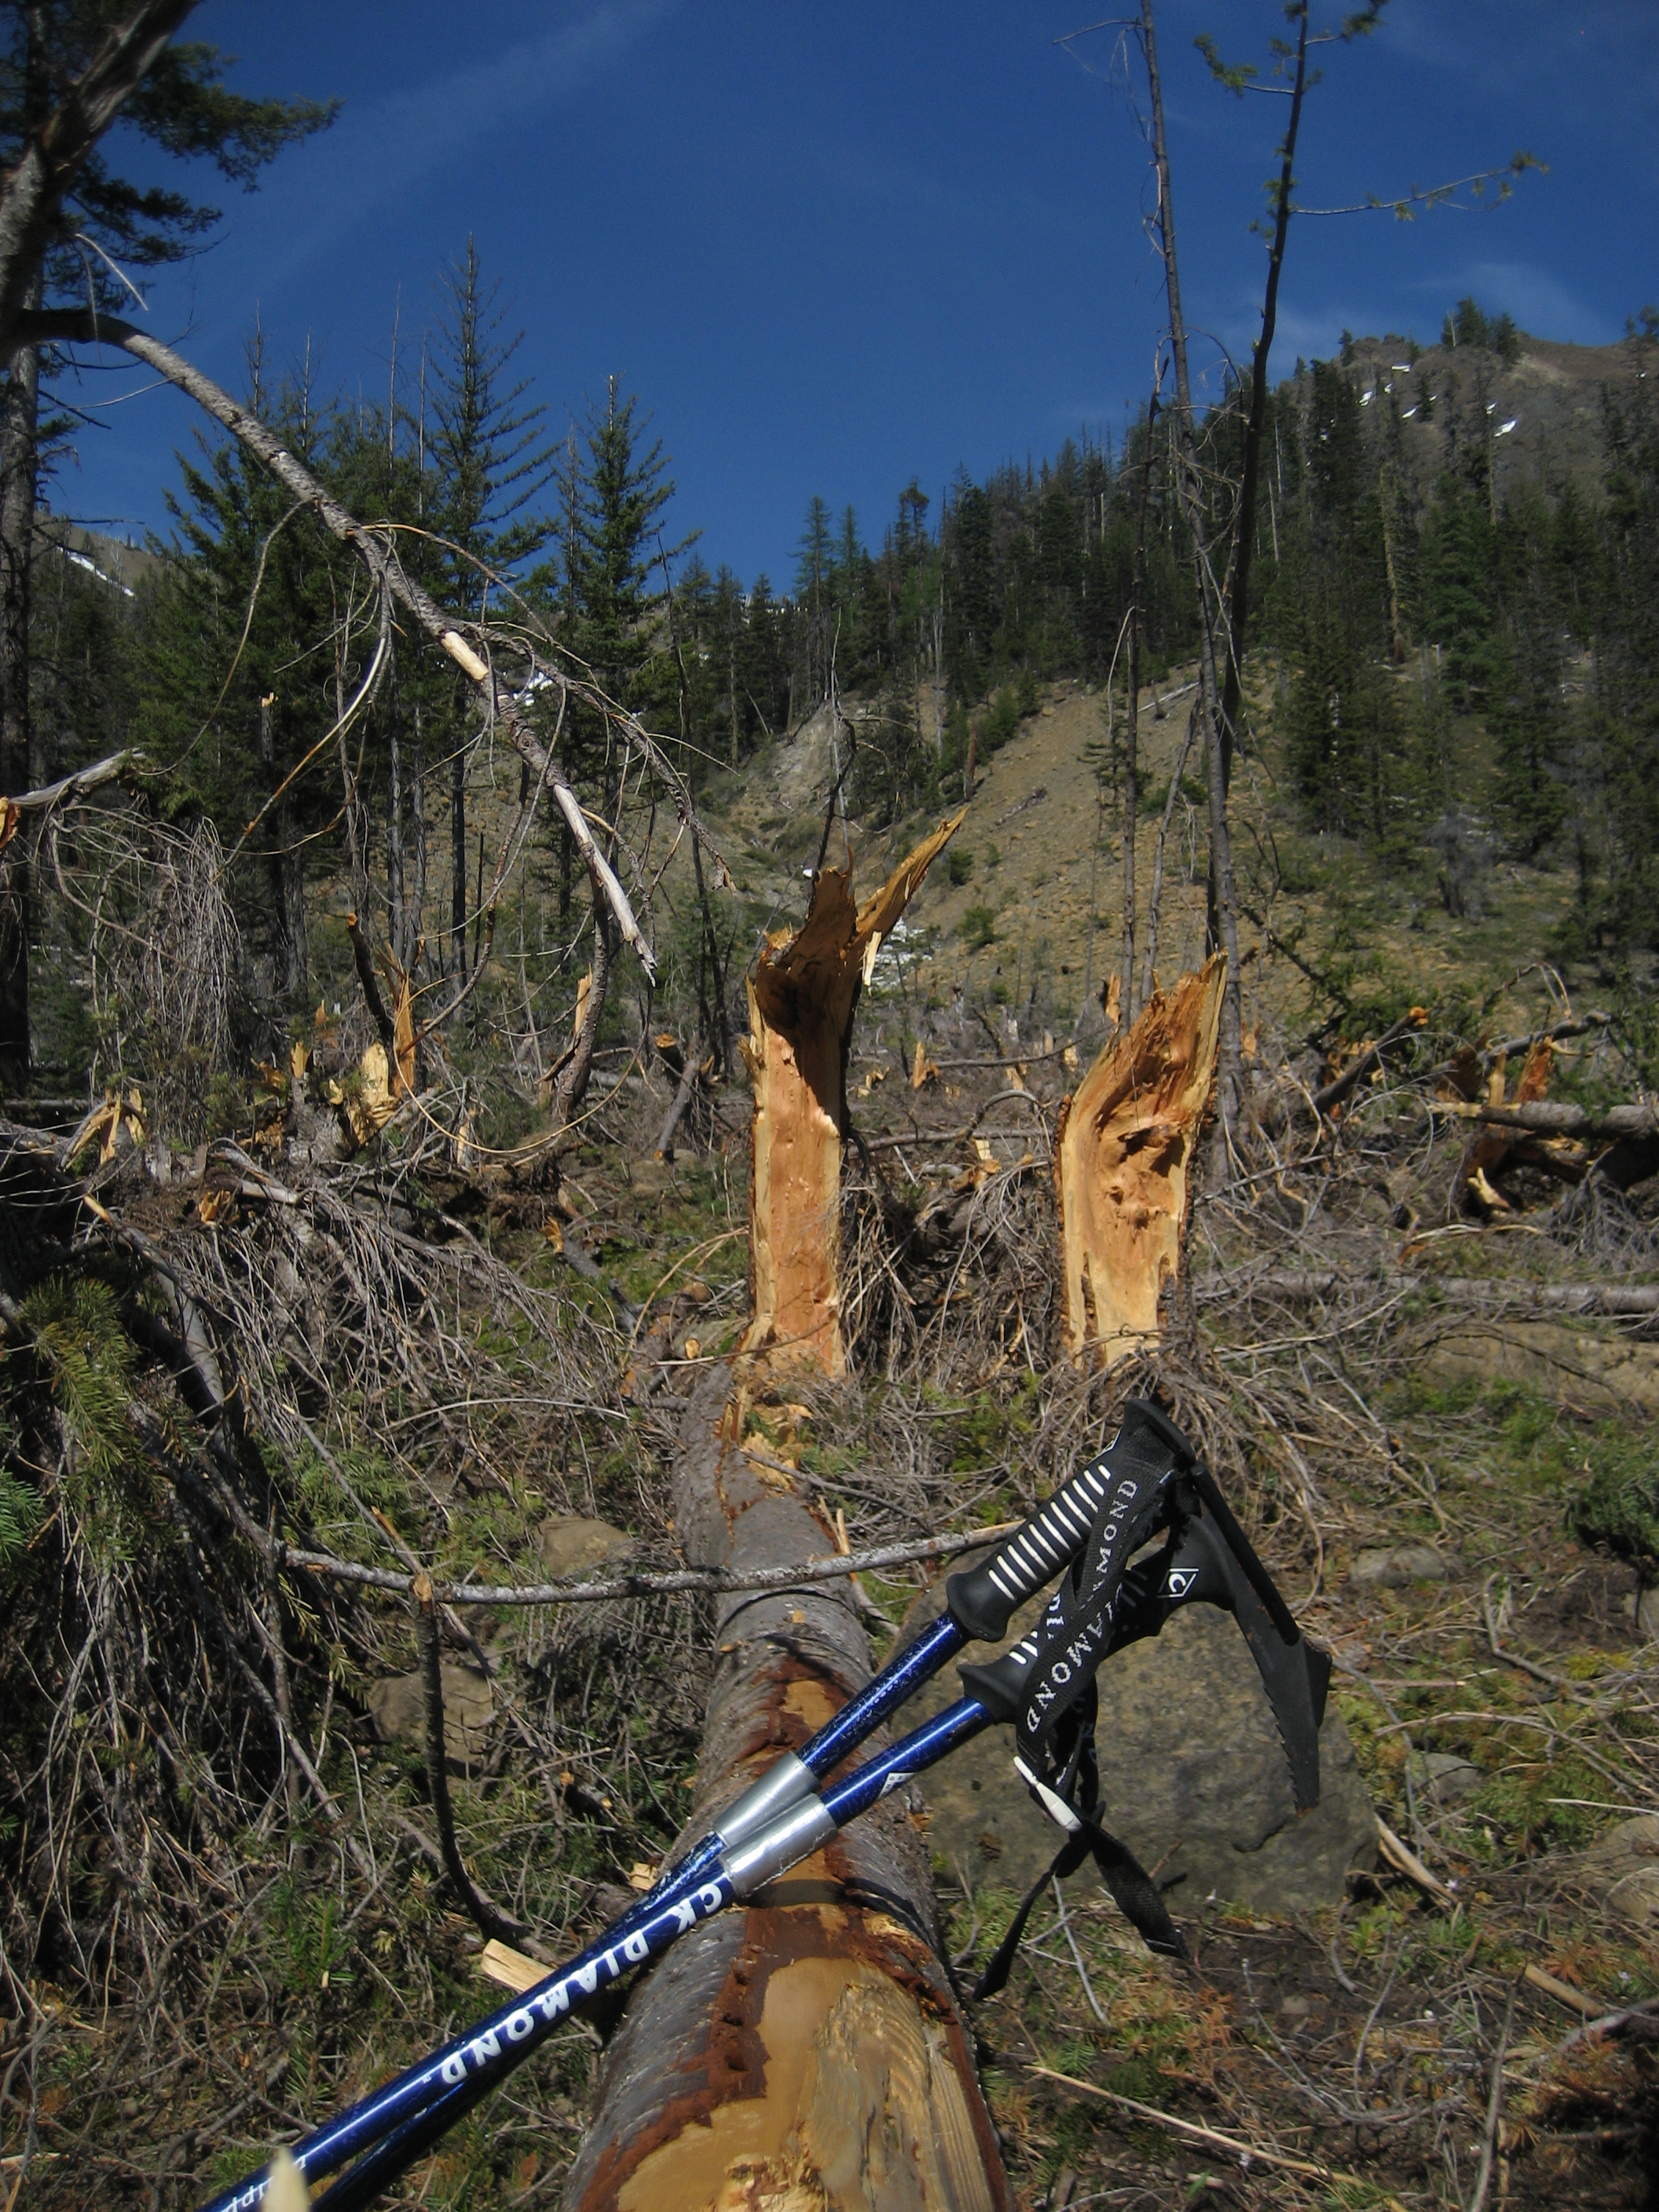
Even though we were in our light hikers, we decided to continue exploring anyway, and we followed the Mt Lillian trail 1601 until it headed into the trees where the sun hadn’t melted it and the snow looked pretty continuous. We backtracked a couple hundred yards and followed a 4WD road north along the ridge. We would break through occasionally, but the rapidly expanding views enticed us on. We entered a burn area from the massive, 42,000+-acre Table Mountain Complex fire in 2012.

The burned forest was a fantastical landscape rendered in black and white. It was easy to imagine it as the scorched aftermath of a fantastical dragon battle.

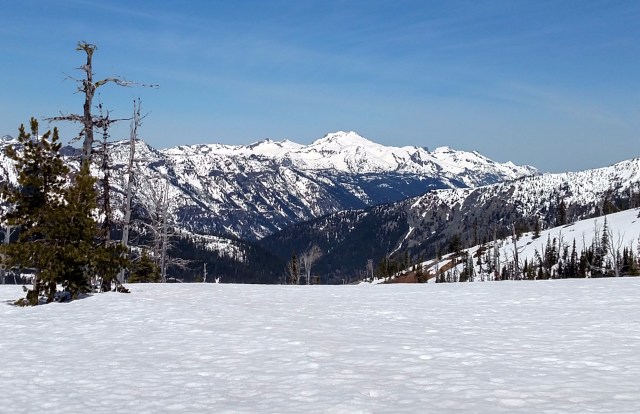
We continued out to a high point at just under 6000 ft. We had a good look into the Table Mountain plateau, and to the Stuart and Teanaway peaks where we would spend the rest of the weekend skiing.2017-05-19 15.03.23On the way out we followed the main trail and discovered that the trailhead had in fact been moved – apparently some time ago – to the end of the road.

We dodged the pothole minefields on the Teanaway River Road and camped at Beverly Camp. We found a great site right next to the river. Over a dinner of noodles with peanut sauce and asparagus we discussed our plans for the next day and settled on Bean Creek basin. We went to sleep with the sound of the rushing river creating a white-noise background. At one point I woke up completely disoriented, wondering where the loud roaring was coming from before remembering where I was.

After a quick breakfast at 5:30am we packed for the day’s tour. After a short, bumpy drive to the trailhead we put skins on skis, loaded them on our packs, applied a coating of sunblock and hit the Beverly Turnpike trail.

2017-05-20 06.38.10

2017-05-20 07.12.31

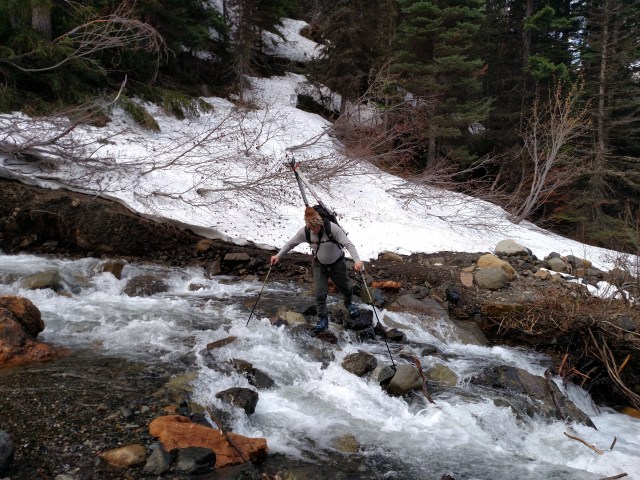
The first challenge to entering the basin is the creek crossing. It wasn’t quite cold enough to freeze overnight, so there was plenty of water in Bean Creek, making the crossing a little adventurous.

2017-05-20 07.19.35

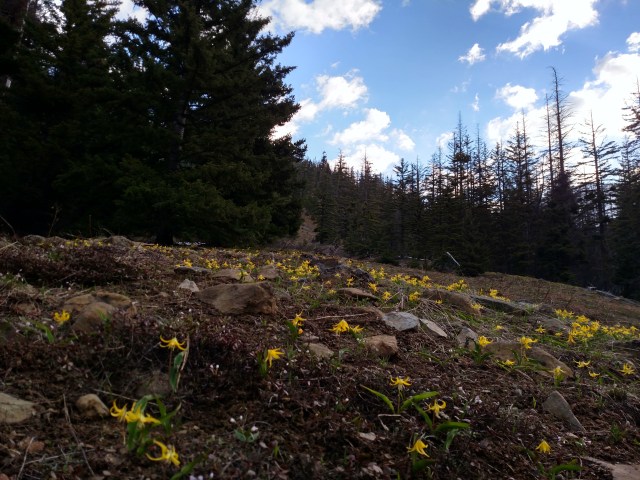
The delicate avalanche lillies were in full bloom.

We finally got to put on our skis at about 4700 ft as you enter the basin proper. While there were many tempting slopes to ski, including the large west face of Earl Peak, we decided to head for Mary’s Peak at the west end of the basin.

2017-05-20 09.04.28

Mary’s Peak is in the center at the head of the basin.

The weather was giving us periods of overcast and sun, which was a good thing for us since it helped prevent the snow from getting cooked too early.

2017-05-20 10.09.03

Looking SE with the west face of Earl Peak in the background.

2017-05-20 09.52.30

By the time we hit the 6700ft summit a little before 11am, it was windy and cold with clouds roiling around the peaks, obscuring the tops of the Stuart Range peaks.

2017-05-20 10.56.38

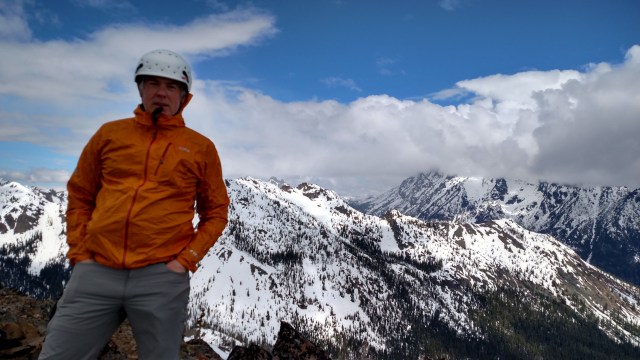
Obligatory summit shot with Mt Stuart in the clouds

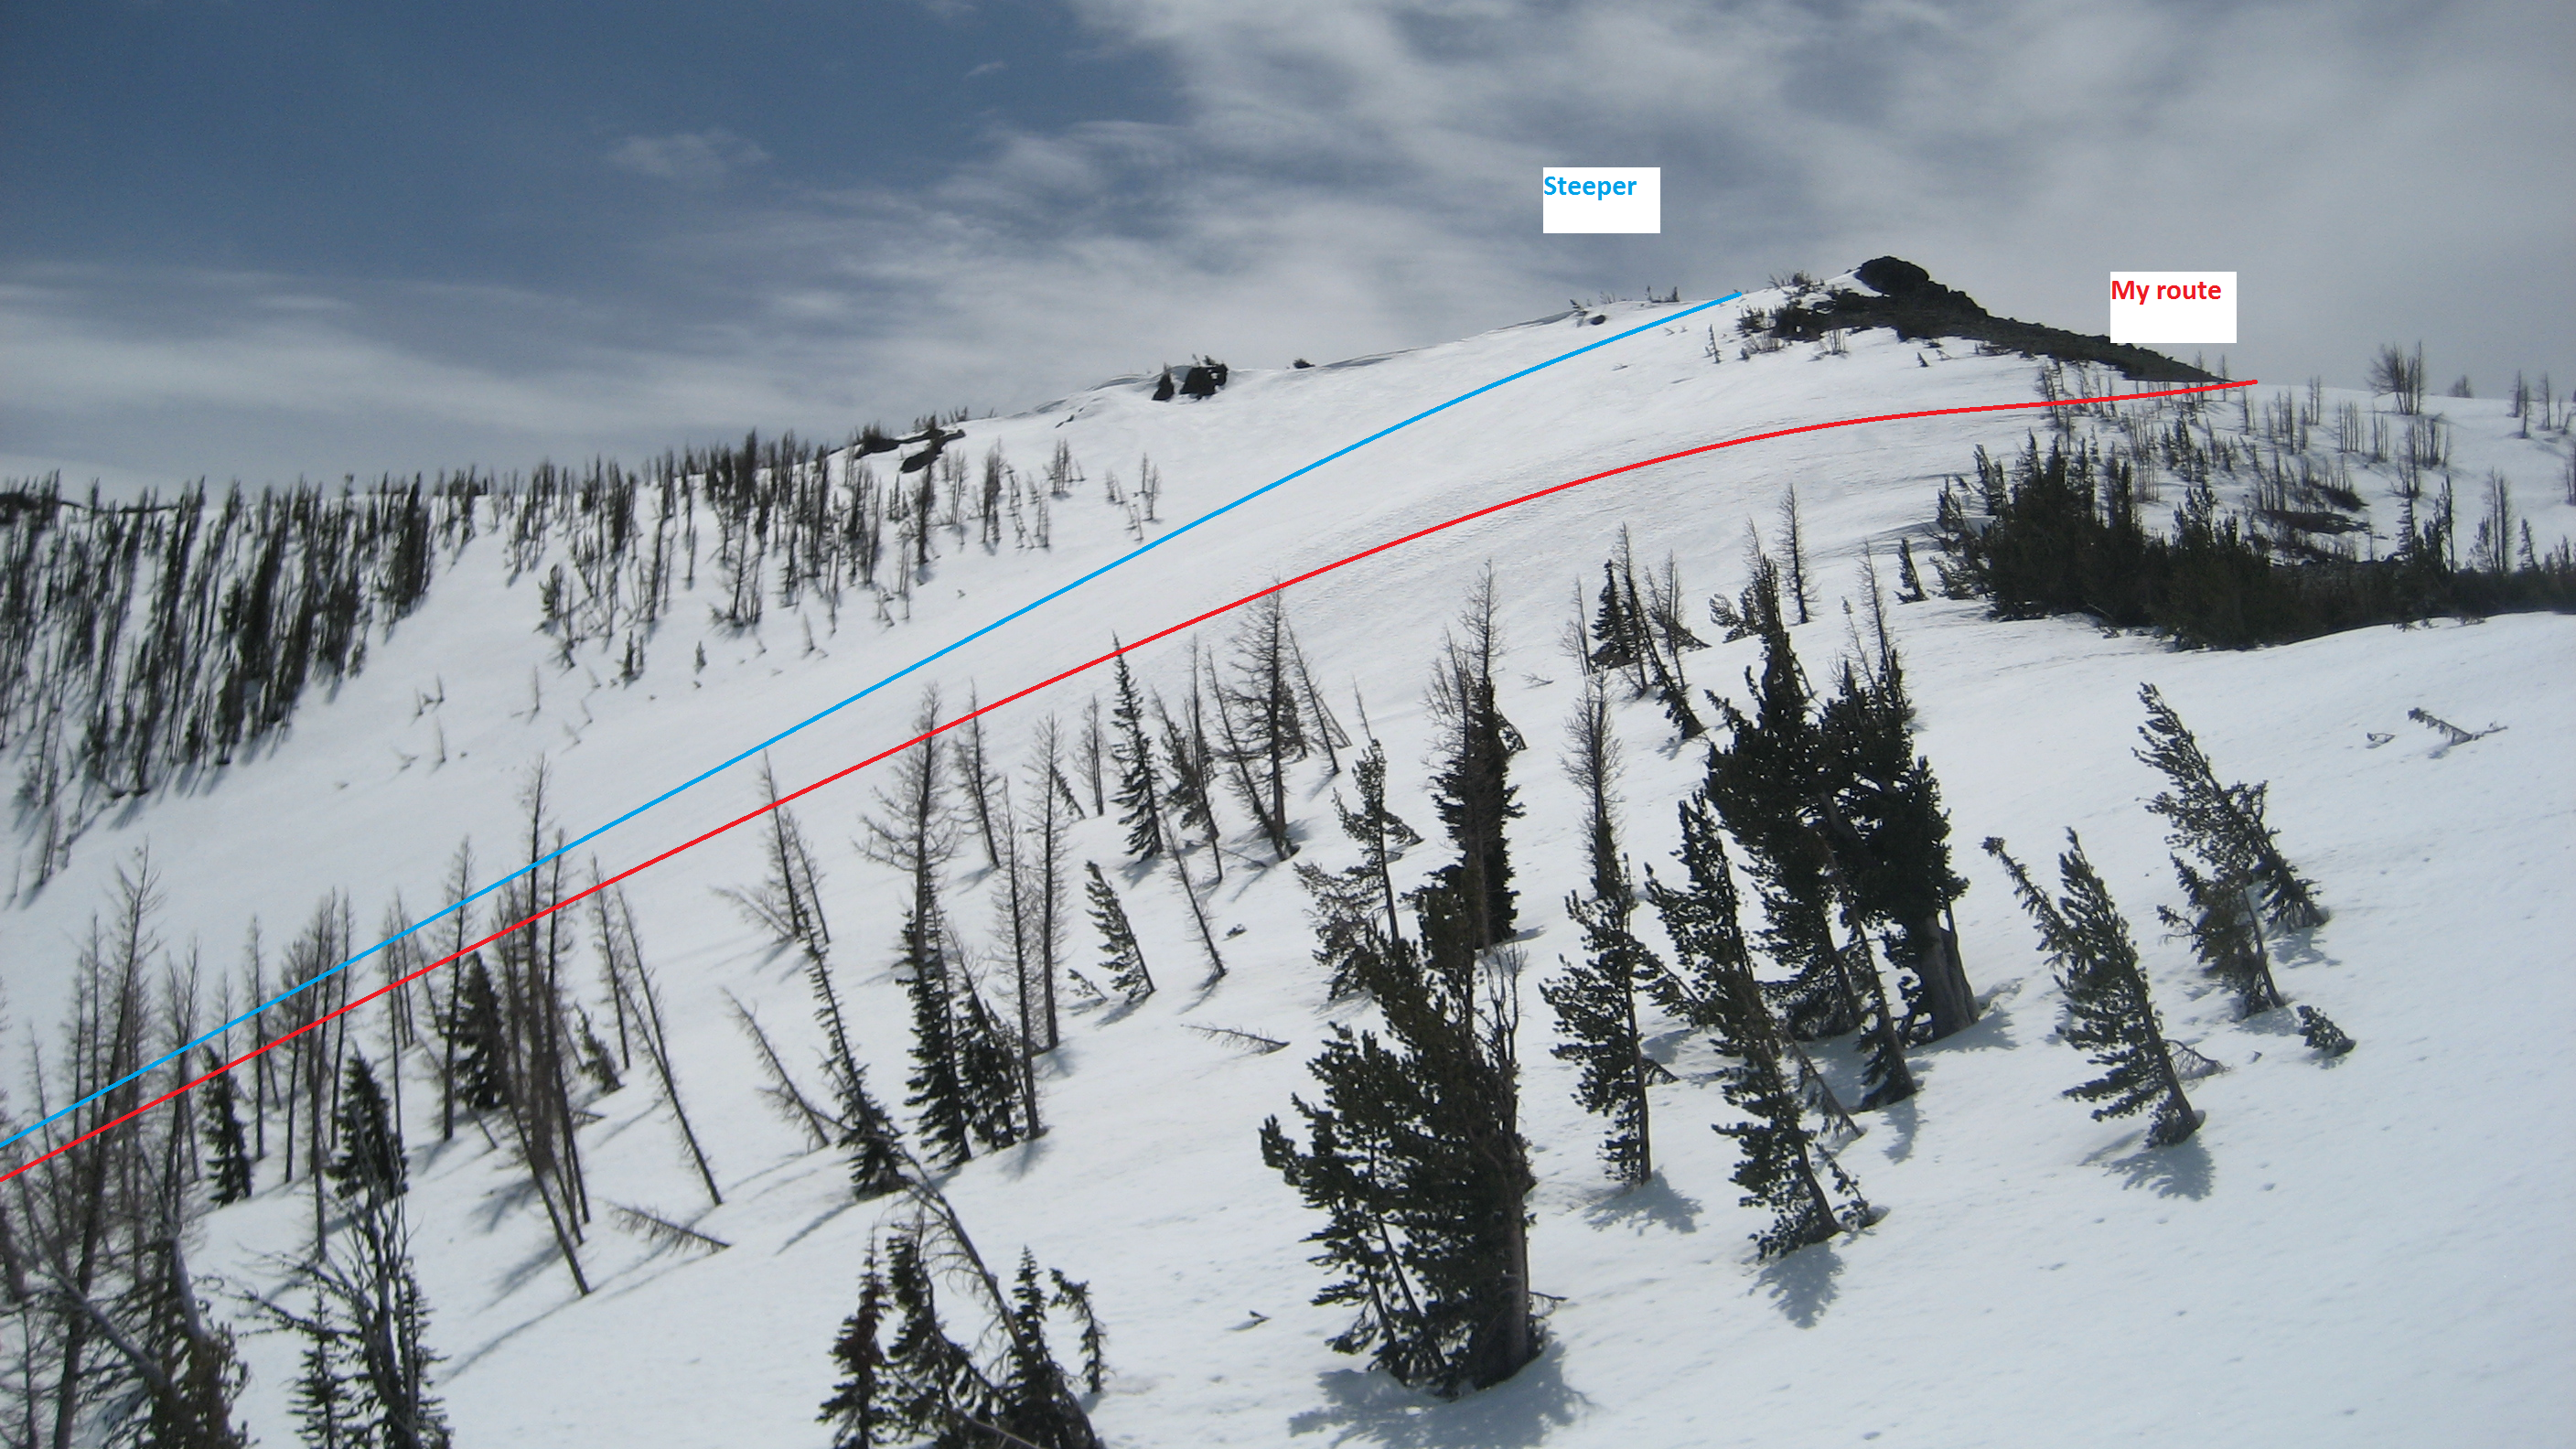
After a brief snack and summit photos, it was time head down. From here we discussed descending along the ridge toward the low pass between Fourth Creek/Beverly Creek and making a loop by returning via Beverly Creek, but we decided the better run was back the way we came, so we ripped our skins pushed off.

2017-05-20 11.14.21

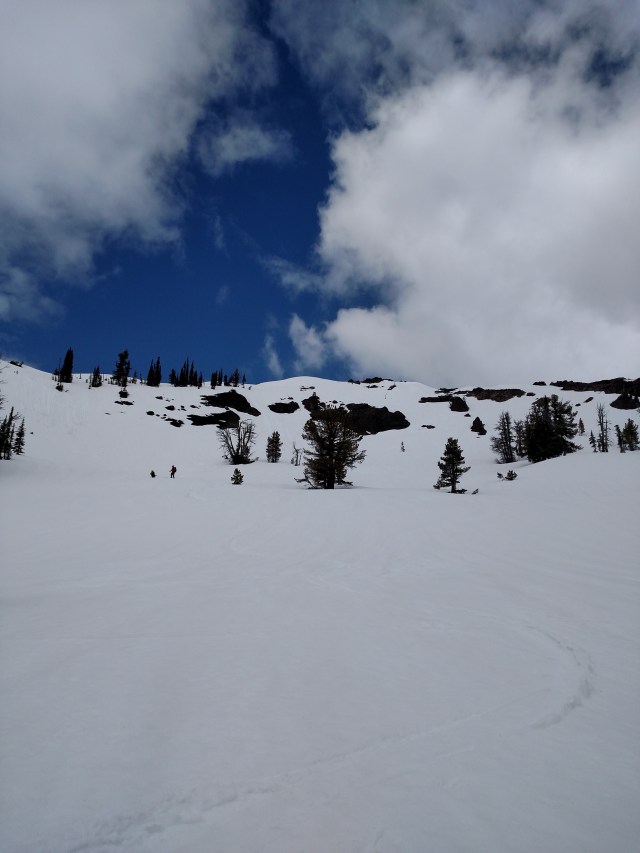
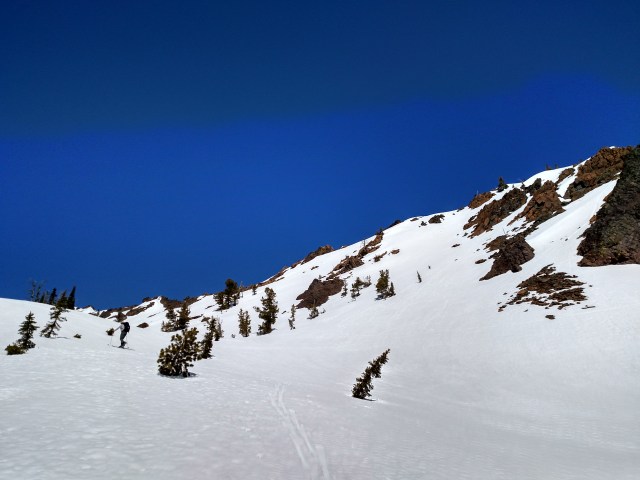
My line off the top took me through a fairly steep (~40 degree), short pitch between the rocks below and to the right of the skyline trees in the above photo. I set of a small, slow-motion surface slough that slithered down the slope behind me.

Beyond that fist pitch, the descent down the basin was a very enjoyable, if somewhat gloppy run. By the time we descended 1000 ft the sun was out again and we stopped for a real lunch in the sun and admired the view.

2017-05-20 11.29.40

On the way out of the basin we managed to ski a couple hundred feet lower than we hiked in, but soon we were pounding the trail again, lounging in camp, and enjoying a cold beverage next to the river.

In past years Jonathan and I have done tours up to Longs Pass, Ingalls Pass, and Fortune Peak. We had also gone up to Gallagher Head Lake on snowshoes on a bad weather day. However, neither of us had ever gone up to the pass at the head of Esmeralda Creek, so we decided to make that Sunday’s goal. We had no idea if the skiing would be any good, so there was some chance we would be taking our skis for a long walk

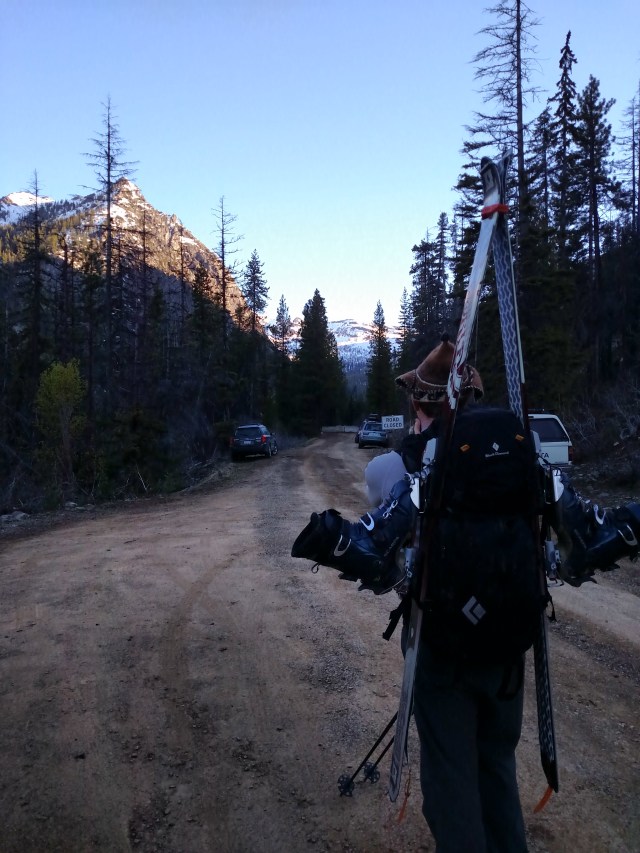
At this time of year the road is not usually open up to the Ingalls Pass trailhead, so it was not really a surprise to find it closed at the Iron Peak trailhead. So once again, we loaded the skis on our pack and trudged up the road.

2017-05-21 06.58.2218 inches of snow still covered the summer parking area, but coverage on the trail was discontinuous for a while, so we hiked for the first

This proved to be a good choice, because the Esmeralda trail is crossed by literally dozens of small creeks. We eventually put on our skis at about 4400ft. Due to a good snowpack and a prolonged cool period this spring, most of the creeks had adequate snow bridges, but with the warm weather the previous couple of days and the expected very warm weather Sunday, they were melting out fast. As we moved up the valley, several were open and involved taking skis off and on.2017-05-21 08.41.44

But the Esmeralda Creek valley is indescribably beautiful, so there was no way this was going to be an obstacle to enjoying such a spectacular day in the Cascades. We were rewarded as views continued to open and provide new perspectives on Esmeralda and Fortune Peaks, Iron Mountain, and the vistas revealing themselves the higher we went.

2017-05-21 09.55.43

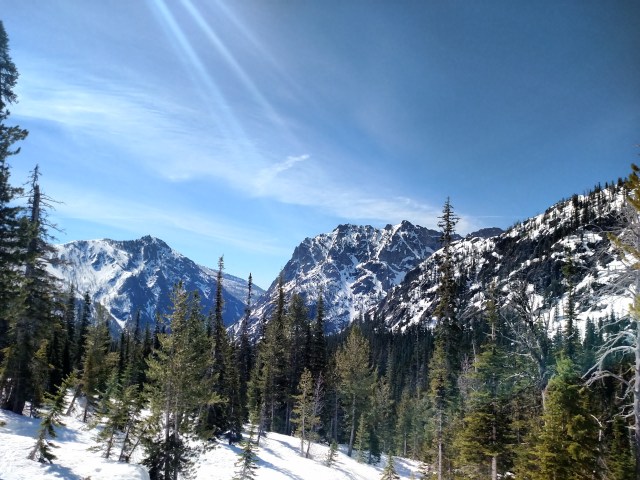
View down Esmeralda Creek valley. Iron Mountain on the left, Esmeralda Peaks on the right.

2017-05-21 10.36.12

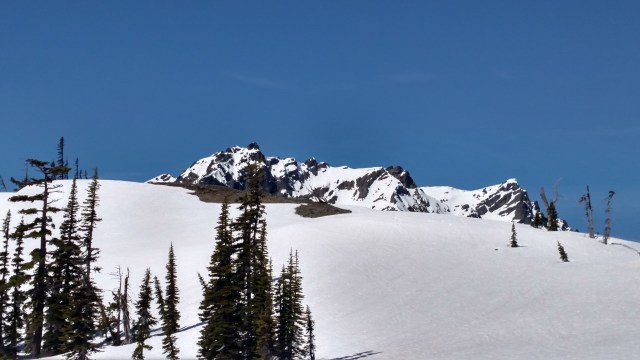
Approaching the pass at 6000 ft Hawkins Mountain comes into view.

Reaching the pass offered a mindblowing view to the Northwest toward Mt Daniel/Hinman and the Chikamin/Overcoat peaks.

2017-05-21 10.41.53

Several sets of deer tracks led us to this view.

Rising another 600 feet just north of the pass is a gentle summit which promised even more spectacular views and a beautiful lightly gladed ski run back to the pass.

2017-05-21 10.40.28

W face of Fortune on the right. We skied the bump on the left.

So after lunch in the sun admiring yet another supreme vista, including a peek of Mt Rainier over the shoulder of Hawkins Mountain we continued skinning up to the summit.2017-05-21 11.53.46

2017-05-21 12.09.03

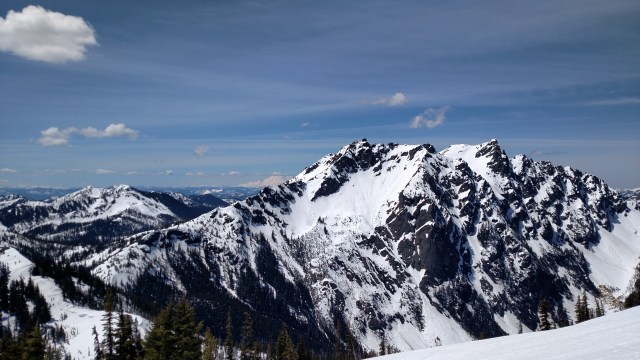
A summit offering from previous visitors.

We descended a slightly westerly aspect back to the pass where the snow was slightly less mushy, then pointed our tips down the sun-baked southeast slopes into the Esmeralda Creek valley. By keeping a little higher line than the approach we managed to avoid some of the worst crossings, but eventually the skis went back on the pack and it was time to hike out, where we noted that some of the skinable snow along the edge of the road in the morning had vanished into the spring mud.


Posted in Uncategorized | Leave a comment

Science Fair 2.0: Waterproof Breathables

2017-05-03 18.13.44

My son and I went back to the outdoor well for the science fair again this year, this time taking a look at waterproof breathable (WPB) fabrics. Gore-Tex is the king of these, but there are many other makers as well. In their marketing materials for Gore-Tex Pro, a 3-layer construction marketed for extreme conditions, Gore states the material is “Extremely breathable” and the benefits include “Minimised risk of sweat accumulation and maximised comfort at high activity levels or during activities with frequent work rest cycles.” Pertex claims their Shield Plus WPB has “a high level of dynamic breathability – the harder you work the greater the breathability of the fabric.” Those are indeed  very bold claims about achieving contradictory performance characteristics from a single fabric.

Andrew Skurka, a long-distance speed hiker with a huge amount of trail experience, in several articles on his blog, excoriates the makers of these materials – especially WL Gore, the maker of Gore-Tex – for their unrealistic marketing claims about their fabric as a panacea for performance across a broad range of activities conditions. He calls Gore “the King of Hype.”

Technically, WP/B fabrics are breathable, i.e. moisture can pass through the fabric. But the level of breathability is inadequate to keep up with moderate- or high-aerobic activity, even when ambient humidity is very low. I’m surprised that fabric manufacturers have never been sued for false marketing claims, given how they describe the fabrics as “extremely breathable” and post photos of a runner in a WP/B shell. – Andrew Skurka, 2015

Mr. Skurka’s opinion struck a nerve with me because I had reached a similar conclusion in my own experience with Gore-Tex while backcountry skiing in the Pacific Northwest. I actually changed my layering system in an acknowledgement that what I had was not effective enough for the cost ($). More on that later.

To further complicate matters, according to an advice column for REI, “An important factor for shoppers to recognize when they feel confounded by the complex-looking lab results they see promoted by some rainwear manufacturers: No universally accepted standard for fabric breathability exists.”

Before we get into our findings, I want to make clear that the limited, marginally scientific nature of our testing does not allow for quantifiable conclusions about performance under all conditions. That being said, there was still some interesting data, and I believe some broad trends may be inferred from the data. I am already thinking of additional testing we could do in the future.

The Test

The fabrics are supposed to work because of thermo- and hydrodynamics which force moisture to move from a wetter environment to a drier one and warmer air to cooler air. The micro-climate inside the jacket – hot and humid – forces the water vapor from sweat out through microscopic holes in the fabric membrane to the exterior, which is colder and drier.

To keep it relatively simple and manageable (my son is only in 7th grade, after all), we decided to hone in on this problematic “breathability” characteristic. We did not have access to sophisticated scientific measuring equipment, so we put together a relatively simple experiment with household supplies. We got fabric samples from Rainy Pass Repair in Seattle, an outdoor gear repair shop. We saved empty cat-food cans, put 30g of water in them (+/- 2g on a digital postal scale) and secured different fabric swatches over the top a rubber band. We tested the following fabrics:

  • 3-layer Gore-Tex
  • Gore-Tex Pac-lite
  • A proprietary WPB
  • Pertex
  • Pertex Shield +

We also included 2 control samples:

  • An open can (no fabric)
  • A can with an impermeable layer over it (garbage bag)

To establish a base line, we ran an evaporation test inside the house at a relatively steady temperature and humidity. We placed the cans in a box in our guest room at room temperature and let them sit for 24 hours, and re-weighed the cans to determine how much water had evaporated.

The second test was trickier. We wanted to create a large temperature differential to mimic the conditions in the outdoors, so the face of the fabric had to be exposed to the air while the can and water were in a warmer environment, like inside a jacket. We ended up using some scrap insulating foam I had lying around to make an insulated box with a special lid to trap heat inside but leave the fabric exposed to the air. Under the cans I put a heating pad and put the whole thing in our uninsulated, not-completely-enclosed garden shed.Hot box

This worked surprisingly well. At one point I stuck a digital thermometer probe into the box and got a reading of 108 degF when the air temperature was in the low 50s. It was about in the low to mid 40s overnight.

The Data

After 24 hours in their respective environments, here is the raw data:

Warm box + cold air Room temperature
  gm evaporated percent evaportated gm evaporated percent evaportated
open 24 4
impermeable 0 0.00% 0 0.00%
3-layer gore-tex 18 75.00% 0 0.00%
gore-tex pac lite 18 75.00% 0 0.00%
no brand 12 50.00% 0 0.00%
pertex 10 41.67% 0 0.00%
pertex sheild+ 12 50.00% 0 0.00%

The first thing to notice is that in the indoor test without temperature gradient nothing evaporated out of any of the samples.

The second thing is that with a substantial temperature differential a fair amount of moisture evaporated. With the baseline established in the open control sample, the 2 Gore-Tex samples evaporated 75% of the amount of the open control sample. To be honest, that was actually better than I expected. Pertex Shield+ and the proprietary brand were next at 50%, and the regular Pertex at 41.67%.

Conclusions

So what conclusions can we draw from this? How does this relate to the manufacturers’ claims? Broadly, we can absolutely say that when dry, given a substantial temperature differential, WPB fabrics do, in fact allow moisture to evaporate through them, and are surprisingly good at it, with Gore-Tex definitely the best at this. However, it is equally apparent that environmental conditions have an enormous effect on this. It is notable that this test represented nearly ideal conditions. The temperature differential was substantial, there was no precipitation from the outside, and there was no continuous addition of moisture on the inside.

So what about the manufacturers’ claims that these are “highly breathable” across a broad range of activities from “high activity levels” to “activities with frequent work rest cycles.” Some sources say the average person sweats between .8 and 1.4 liters per hour during exercise. The best of these fabrics was 75% efficient in nearly ideal conditions. Garments made of these fabrics are marketed as the ideal solution for use in less than ideal conditions: high output activities like like hiking and mountaineering in wet weather. They aren’t bad fabrics; they are actually very good. But based on these numbers I am highly skeptical that they could come even close to the efficiency the manufacturers claim. And the reality is that when you factor in pockets, bunched fabric under pack straps, etc. you lose even more efficiency. It may be better than wearing an impermeable fabric, but it is likely far from the do-everything performance the marketing hype claims.

So what should we do? I suspect that direct venting (like pit zips) is likely to have a much greater effect on moisture buildup than the breathability, but opening zippers compromises the garment’s waterproofness. As far as comfort, in the real world there is also the sweat saturation in the layers between your skin and the shell: baselayers, insulation, etc. It seems to me that start and stop activities are probably where these fabrics are most beneficial, when there is an opportunity to move moisture out during periods of rest when you aren’t adding more.  Regardless of the material, in really wet weather the best strategy is probably to regulate your pace to minimize sweating to begin with. And chances are, you will just get damp anyway.

My Current Preferred System

A couple of years ago I decided that here in the Pacific Northwest, where temps aren’t generally super cold and the moisture level is often similar outside and inside of my jacket, Gore-Tex just wasn’t worth the money. I modified my system for cool, moist, high-output activity to be cheaper and more flexible. Instead of the standard base and insulating layers with a WPB over it, I typically wear a light, uninsulated softshell (13 oz.) for most conditions up through mist and snow. When it gets wetter (rain) I put on a Pertex Shield Plus hardshell (6 oz.) over the softshell. This softshell/ hardshell combination is 19 oz. – in line with many much more expensive 3-layer WPB shells, and more adaptable. In warmer weather, instead of the softshell, I use a running jacket which only weighs 4.5 oz., making a 10.5 oz system. Here is my theory of why I think it works:

The light softshell is much more breathable than a WPB, allowing more moisture movement from my inner layers, but it is also a decent DWR layer and acts as a barrier to keep the moisture trapped under my hardshell away from my inner layers.

Posted in Uncategorized | Leave a comment

Backcountry Science Fair: White Gas vs Isobutane

I recently read someone’s “Best of 2016” list of backpacking stoves. In the comments on the Facebook page, some people were asking about canister vs liquid fuel (white gas) stoves. Since the site that came up with the list is mostly tilted toward ultralight backpacking, most of this discussion centered around weight. The conventional wisdom is that canister stoves are better suited for shorter trips, but liquid fuel is better for longer trips because the weight of multiple canisters adds up to become heavier than using fuel bottles which can carry more fuel per ounce of container. MSR, the most common backcountry stoves in America, says as much in a 2013 Summit Register blog post. Specifically they claim, “The weight you save [using liquid fuel] versus canister fuel will offset the lighter weight of the canister stove as well.” I began to wonder: When does that crossover happen? How long a trip? After how much burn time? I had never seen any actual data on this.

One of the most hated aspects of parenting has got to be the science fair project. It can be the source of high levels of conflict, frustration, and resentment. One day in March, I received the dreaded notice: “The science fair is coming up. You should be talking to your child about his/her project and submitting a proposal to his/her science teacher.”

You can probably see where I am going with this. I own 2 backpacking stoves: an MSR Pocket Rocket canister stove and a venerable MSR Whisperlite International. I worked with my son to collect some data on the 2 stoves. The following is what we found, which was not necessarily what I expected. If you want to skip to the conclusions scroll down to the Data and Conclusions sections.

Caveats

  • I geared this test, including cooking times, more to the “average” backpacker as opposed to dedicated ultralight or minimalist style. Your mileage may vary significantly based on your cooking habits.
  • This test was limited strictly to weight. Other factors will be discussed in the “Additional Considerations” section.
  • This was not a laboratory precision test, it was more like a side-by-side real world test.
  • This test is specific to these stoves. There are many other models, some with supposedly greater efficiency. My Whisperlite is definitely not the newest model. New ones may be more efficient. I also did some basic maintenance on it, but it was not in pristine condition.
  • I used a digital shipping scale with a stated accuracy of +/- .1 oz
  • I used standard Crown white gas, for the liquid, and MSR brand isobutane for the canister.
  • Air temperature was about 60 degrees with a light breeze.
  • The test was based on a solo backpacker scenario: one person has to carry the stove and fuel (the weight can’t be divided between party members), and the amount of water required for a meal is smaller.
  • After the first burn we discovered that the standard spring kitchen scale (pictured below) was not accurate enough, so we re-did the test using a digital scale

2016-04-12 10.49.54

Method

I wasn’t sure at the start exactly what data would best represent the findings, so I decided we would collect a lot. To make it more like the real world we decided to do the test outdoors in our back yard. I did provide a wind break around the stoves since that is common backpacking practice. I also decided to use very cold water to emulate a snowmelt stream, so I iced water to a temp of 36 degrees F (2.2C). We performed the following test twice to make sure our data was consistent.

  1. Filled and weighed the liquid fuel bottle, stove, and pump for the Whisperlite, and the stove, a full and an empty MSR Isobutane canister for the Pocket Rocket.
  2. We burned each stove for 15 minutes at full power. We burned the stoves simultaneously so conditions were identical.
  3. We measured 2 cups of water, placed in an aluminum backpacking pot (MSR) and timed how long it took to bring to a rolling boil.
  4. We reweighed the fuel bottle and canister to determine fuel usage. The second time we used a canister that was approximately 1/3 full to account for some loss of pressure.
  5. We calculated fuel usage for ounces/per minute, minutes/ounce, and ounces per meal (definitions below).

Definitions

We came up with some terminology to make the data easier to present.

  • Carry Weight – The weight of everything required to use the stove, including stove, bottle, pump, canister, and fuel. In the case of the canister stove the weight increases in larger steps since you can’t fill the bottles with the amount of fuel you need for a specific amount of time. I did not use the wind screen on the Whisperlite as this test was based on minimum weight.
  • Meal – My son likes Top Ramen, so we decided to use that as a standard meal. We decided a reasonable meal would include bringing to a boil 2 C water, keeping it boiling for 3 minutes, then boiling another 2C for drinks, cleanup, etc. Obviously this will vary depending on what you cook and your camping habits, but it seemed like a reasonable baseline for comparison for average backpackers cooking their own food as opposed to ultralighters who rely more on rehydrating.

Data

In the “Fuel Only” table below, I compare the weight of only the fuel and container (bottle vs canister). You can also view it in a spreadsheet by clicking the image

Fuel Only

Some particular items pop out in the burn time (table on the left):

  • Isobutane is much more efficient, requiring only .85 ounces per meal, while the white gas required 1.1 ounces. That is an efficiency gain of about 23%.
  • White gas is faster boiling, but as noted above, requires more fuel to do so.
  • Initially, white gas has a clear advantage. For 40 minutes of burn time the white gas and bottle weigh 8.4 oz while the canister weighs 13.2. However, due to the increased efficiency, the longer you burn, the more weight efficient the isobutane becomes. At times it is actually more weight efficient than the white gas.

Overall, however, looking at the table on the right which compares fuel weight per meal, white gas stays consistently ahead, though never by more than just under 6 ounces.

Which brings me to the “Carry Weight” table.

Fuel Carry Weight

Once you add in the weight of the stove, the whole table flips. Some items of note:

  • The Pocket Rocket has an 8.5 ounce advantage over the Whisperlite
  • In “Carry Weight”, the Pocket Rocket starts out with a 3.6 ounce advantage over the Whisperlite.
  • The weight advantage per meal (table on right) for the Pocket Rocket mostly hovers around the 5 ounce mark. That is a difference the white gas is never able to make up, directly contradicting the claim made by MSR.
  • UPDATE: Based on some feedback I added a table based on fuel use per day assuming that breakfast would be more likely a rehydration meal (e.g., instant oatmeal) that does not require cooking. There are 2 places that the liquid fuel wins when you have to add a canister at the same time you are maximizing the fuel storage in the bottles (maximum weight efficiency).

Conclusion

In my test, with weight as the sole consideration, there is no scenario in moderate conditions under which the Whisperlite makes sense. (See below for comment on cold conditions). That was frankly astounding as it contradicts everything I have read and assumed. The fact that you could carry 2 Pocket Rockets and still not be any worse off is even more amazing.

However, the difference is never more than a little under half a pound, and mostly around 1/3 of a pound, so if you aren’t counting every ounce, it may not matter to you. Which brings me to…

Other Considerations

While weight is certainly a prime factor in choosing a stove you will be carrying on your back, there are many other factors to consider. MSR discusses them in their blog, but I will cover them with my own spin here.

Speed and convenience

How long do you want to wait for dinner? Winner: canister stove, hands down!

  • The Whisperlite needs to be assembled by screwing in the pump, connecting the feeder hose, and pumping it up. Then it needs to be primed by burning liquid fuel to heat the gas generator. This requires a liquid fuel flame which takes practice to do safely, additional time to perform, and should NEVER be done inside a tent. Disassembly has to be done carefully to avoid getting fuel on everything else. There is also the risk of a leak or spill in your pack.
  • Canister stoves are as easy as it gets. A canister stove just screws on and is ready to light. You can be heating up your water in less than a minute after unpacking it.
  • You cannot ship or fly with pressurized fuel canisters. In theory you can’t fly with fuel bottles either, but there is anecdotal evidence you can get away with it as long as they are clean.
  • Maintenance – there is not much to maintain on the Pocket Rocket. The Whisperlite requires maintenance. However, it is largely field repairable, while the Pocket Rocket is not.

Volume

How big a pack do you want to carry? Winner: mixed.

For the fuel, white gas wins, unless you are on a very short trip (2 days). But the Pocket Rocket stove is tiny compared to the Whisperlite.

  • An 11 oz fuel bottle can hold fuel for about 9 meals in about 30 cubic inches (2.5in x 6in). An 8 oz isobutane canister with fuel for about 8 meals takes up 46 cubic inches, or about 50% more space in your pack. A 22 oz fuel bottle carries fuel for about 19 meals in 56 cubic inches. 19 meals would require two 8 oz and one 4 oz canister, which would take up 125 cubic inches. That is almost 2.5 times more space than the liquid fuel!
  • The Pocket Rocket can offset some of the fuel volume because it is small enough to store in the pot with enough room to pack some food in with it.

Cost

How much would you pay? Winner: it depends, but I say the canister.

  • At the time of this writing, the cost of a Whisperlite International and 11 oz fuel bottle on a major outdoor retailer’s website is about $118. A Pocket Rocket is $40.
  • A quart (32 oz) of Crown white gas is $7. That translates to .$21/ounce. An 8 oz MSR Isobutane canister is $6, or $.75/ounce, more than 3 times the price per ounce.
  • You can buy 13 canisters, or 100 meals, with the price difference.
  • It would take something like 150 canisters for the $82 lower price of the stove to be offset by the higher price of the fuel.

Environmental

Worried about your carbon footprint? Winner: white gas

  • Liquid fuel bottles are reusable. Fuel canisters are only sometimes recycleable
  • Manufacturing liquid fuel is a lower footprint process

Other variables

  • Conditions – Results would likely be very different in cold conditions (below freezing) when you have to melt snow for water. Canisters do not perform well in cold conditions. Systems that can run an inverted canister perform well, but the stoves are more similar in weight and volume to a liquid fuel stove. Winner: white gas
  • Fuel availability – Canisters are not available everywhere. Winner: white gas/multi-fuel
  • Party size – Splitting the weight between partners can render the weight differences negligible.
  • Leftovers – When you have a partial canister left, if you don’t have enough fuel for your next trip you bring a new canister (which may also end up partly full) or you end up carrying the weight and bulk of an additional canister.

Further Investigation

I would like to do some additional testing with newer stoves. Some of the system stoves are supposed to be very fuel efficient. Other factors like water temperature, air temperature, wind exposure, etc. could strongly influence the data.

My Preferences

  • I think for solo trips in moderate conditions requiring only 12 ounces of IB fuel or less (one 8 oz +1 4 oz canister) I will stick with the Pocket Rocket.
  • For the same duration with 2 or 3 people I would consider 2 Pocket Rockets, with the additional convenience of having a second stove either for backup or for 2-pot meals or simultaneous cooking.
  • For longer trips I would probably still opt for liquid fuel unless I thought I would need to cook in the tent or vestibule.

Posted in Outdoor Recreation | 6 Comments

My Relationship With Risk

Nearly 25 years ago in Colorado, my climbing partners and I nearly made a tragic error. We glissaded down a sun-blasted gully on an Indian Peaks summit in the early afternoon. My friend Mike was nearly buried in a wet snow slide. Within 20 minutes, every other gully in the cirque slid on its own. We had no avalanche gear, skills, or education.

Pretty much everyone who has spent any significant time in the backcountry can identify similar close calls. Risk is part and parcel of recreating in the mountains, and an element of danger and uncertainty is part of its attraction. Incidents like this invite self-reflection on our relationship with risk. We each have to decide what kind, and how much, risk is acceptable.

Determining acceptable risk is a highly complex, subjective, and individual calculation in which motivation plays a central role. Currently there is discussion in the outdoor community about whether the proliferation of GoPro cameras and the lure of internet fame (or infamy) is seducing adrenaline junkies into accepting risks they can’t manage and normally wouldn’t take if they didn’t have their own YouTube channel. Debates rage about whether the additional protection offered by avalanche safety gear such as beacons and avalanche packs is offset by the inclination to take on more risk because of that protection. Clif Bar ignited a controversy about the role of sponsorship when they unceremoniously dropped some of their high-profile sponsored athletes, free-solo climber extraordinaire Alex Honnold among them. In explaining the move, Clif Bar said, “…these forms of the sport are pushing boundaries and taking the element of risk to a place where we as a company are no longer willing to go.” Steve Casimiro, in his essay Clif Bar and the Power of the Corporate ‘No’, says sponsorship “…creates cultural pressure on athletes to outperform themselves and others.”

Pressure to not “wimp out”, to earn notoriety, to avoid disappointing friends or sponsors, to make an investment of time/effort/money worthwhile, or to achieve a goal can be a powerful influence. It causes skiers and climbers to ignore warning signs or minimize their significance, sometimes resulting in tragedy. Skier/researcher Ian McCammon, in chapter 1 of The Human Factor – an excellent new multimedia series focusing on decision-making in avalanche terrain – calls the subconscious pressures that negatively effect decision-making “heuristic traps.” A heuristic is a sort of mental shortcut; a rapid, unconscious decision that in the wrong context allows undue influence to factors that have little or nothing to do with managing the current situation. “Someone else skied it, so it must be safe,” is an example of a very common heuristic trap. McCammon has identified 6 categories he calls FACETS that are common in avalanche accidents. Applying a process designed for efficiency in an environment where data and decisions need to be carefully and rationally examined opens us up to all kinds of irrational choices, resulting in exposure to greater risks than we should rationally accept.

Casimiro suggests that Clif Bar saying “No” is a good lesson because, like deciding to turn back on a tour, “It takes courage to risk losing money or customers, or acknowledge that you’ve reached your limit and willingly face the criticism or derision you know will come.” Alex Honnold, who lost his sponsorship, agrees. “The risk decision that Clif is making is the same kind of decision that we all make as athletes…That’s the same kind of line I draw with risk.”

“Drawing the line” is where the rubber meets the road – or the ski meets the snow – in the decision-making process. To be clear, I am no extreme athlete. Compared to many (most?) of my skiing and climbing friends I am tilted solidly to the conservative end of the risk spectrum. But that does not mean I am risk free. I have made plenty of questionable decisions: some ignorant like the incident in Colorado, some calculated and deliberate, and also a handful that in hindsight I recognize as the result of McCammon’s traps. To be sure, I have been lucky on occasion, but I believe that mostly I have gotten away with it because my tolerance for risk demands that I generally operate with a substantial margin for error.

Nowhere do I like that margin larger than in avalanche terrain. Unlike all those years ago in Colorado, I now know enough to know it is impossible to be perfectly safe in avalanche terrain. The harsh reality is that we educate ourselves about causes, weather factors, methods of evaluating snowpack, safe travel techniques, etc., but we can’t know with certainty what is going on under the surface; there are too many unseen variables. In “The Human Factor,” Garrett Grove, the lucky survivor of a ride in an avalanche in Alaska, describes what makes avalanche hazard unique: “In rock climbing, you can see that crimpy little hold just beyond your outstretched fingertips. You can see the 500 feet of gaping air between you and the scree field below. An avalanche, on the other hand, is invisible.”

My main climbing partner and I had a motto: Discretion is the better part of valor. It served us well and I still say it frequently. I am proud of my long track record of “drawing the line”. I have turned back; I have second-guessed the weather, my health, and my ability; I have not skied a line; I have listened to that vague gut feeling that things just weren’t right, and the feeling that I didn’t have “it” that day. I may have missed out on occasion, but I am OK with that because I also didn’t die. As Alex Honnold put it on his Facebook page: “We all have to be comfortable with our own choices.”

Posted in Outdoor Recreation, Skiing, Skills, Uncategorized, Winter Recreation | Tagged , , , , , , | Leave a comment

Maps & Navigation: What is a Datum and Why is it Important?

Few things are more frustrating as an educator than reading a trade magazine from a major organization in a particular field and finding a glaring factual error in a how-to article. About a year ago I was reading an article about using maps for navigation in a magazine from a major outdoor organization. It started innocently enough; in the “Tips and Tricks” section the author emphasized the importance of not neglecting map and compass skills in the age of GPS. I wholeheartedly agree with this philosophy since a compass does not require batteries, a display, satellite reception, software, firmware, or any number of technical problems that always seem to plague our electronics at the least opportune time. (See my previous post Maps & Magnets in the GPS World for more on this topic).  I had to heave a sigh of frustration, however, at the next paragraph.

“Make sure you know the datum you are working with.”  So far, so good; this is absolutely true, and can be absolutely critical to finding a specific location. “Is it latitude/longitude? Is it Universal Transverse Mercator?” D’oh! Lat/Long and UTM are not datums; they are coordinate systems.

For those who are not familiar, a coordinate system is the naming system we use to measure and locate a position in space or on a graph. The most familiar is the x/y axis of the Cartesian coordinate system we learned in basic geometry. In Latitude and Longitude we essentially lay a graph over the surface of the earth and measure in degrees E or W (x axis) of the Greenwich meridian and North or South (y axis) of the equator.

The datum is the mathematical model or baseline reference from which the coordinates are measured, and as precision and more advanced mathematical modeling has progressed, not all maps use the same one.  This results in a crucial detail for navigation and search and rescue: one coordinate set (i.e., a lat/long measurement) can represent more than one location. An analogy would be measuring your property for a new driveway. You measured 10ft North and West from your mailbox, but your contractor measured 10ft North and West from the property corner, and now you have a driveway in your bathroom! You have to agree on the same reference point to find the correct location for your driveway.

Compare these 2 images. They are the exact same base map. Where the lines cross represents a coordinate. They have the same name (48.85 degrees N, 121.71 degrees W), but are in different locations.

84      27

While the difference does not appear dramatic, the location discrepancy between datums varies and can be quite substantial (hundreds of meters in some places), with significant hazards or obstacles (avalanche slope, cliff, river) between them. If a rescuer does not know what datum a set of coordinates is based on, he/she cannot know with certainty where the exact location is.

To help, here are some rules of thumb: The most common datums in the US are North American Datum 1927 (NAD27), NAD83, and World Geodetic System 1984 (WGS84). NAD83 and WGS84 are virtually identical. If the person giving the coordinates is using Google Maps or something similar, chances are it will be WGS84. Likewise if they are using an app like Geocaching. If it is a USGS topo map, it is likely – but not always – NAD27. If they are reading it off their personal GPS or mapping software (such as Topo!, Garmin, Magellan, etc.), it could be anything, but in the US is most likely to be one of the three.

Fortunately, the datum on GPS units, navigation apps, and mapping software is selectable in the settings. Finding and using this setting is a very simple but critically important part of training with a GPS. The beauty is that if you have a coordinate in WGS84 on your GPS and need it in NAD27 to draw on your topo map, all you need to do is change the datum and your GPS will give you the same location using a new coordinate referenced to the different datum. This translation is integrated into my GPS navigation training.

Posted in Navigation, Outdoor Recreation, Skills, Uncategorized | Tagged , , , , , | Leave a comment

Preparation + Navigational Skills + Sound Decisions = Survival

This is a great example of the best outcome for a solo lost hiker in the true wilderness of the Olympic Mountains. Note there was no mention of GPS. Maps, compass, and the knowledge to use them!

http://blogs.seattletimes.com/today/2014/09/few-clues-turned-up-in-search-for-olympics-hiker/#comments-page-subtitle

Posted in Outdoor Recreation | Tagged , | Leave a comment

Delayed Gratification

Sometimes a delay is worth it. I had planned a trip with some other members of my ski patrol, but due to the hideous weather a week ago, I rescheduled it. Since no one was available this week, I ended up going solo.  I do solo day trips fairly frequently, but in recent times I have found it easy to stick to familiar routes and out of big-mountain environments. But this time – with a lot of warm weather followed by cooler temps stabilizing the snowpack at moderate elevations – I decided to be a little more ambitious and do an overnight into the Teanaway backcountry on the East slopes of the Cascades.

The Teanaway area is one of my favorite backcountry destinations anywhere. I have been to several peaks there, mostly as car-camping based day-trips. One area I had never been was the Stafford Creek trail to Navaho Peak (elev. 7,223′). Navaho is not a terribly photogenic peak; it is a broad, mostly forested, lumbering sort of mountain, but it is a little more remote than neighboring Earl Peak, which I had visited before and is a very popular destination. On paper and on Google Earth it looked like a good candidate for moderate skiing and manageable hazards, an important part of going solo on snow.

I drove over the Cascades, and after a brief delay when I remembered I needed a new annual Forest Pass – and found the Cle Elum ranger station closed for lunch – I weaved my car around the potholes and ruts of FS Rd 9703 to the Stafford Creek trailhead (3,000ft) and hit the trail a little after 3pm on Friday (May 16, 2014).

It was bright, sunny, and hot in the afternoon sun on the western exposure of the trail. In one 10-yard stretch I saw at least 3 different butterflies, white Trillium in the wetlands, and yellow Avalanche Lillies just beginning to bloom. The trail also crosses a couple of very impressive avalanche debris fields.

Trillium in bloom 2014-05-16 16.37.00

The trail was snow-free to about 4,000′, and then was discontinuous snow, so I ended carrying my skis all the way until I located a good camping spot at about 5,000′ (ugh!).
Overnight was clear and cold, with a bright, barely waning moon which made sleep difficult. I left camp under clear, sunny skies at 6:45 in the morning.

Not a bad campsite!

The cold temperatures overnight made the snow very firm and the skinning was perfect. After shedding layers a couple times going up through the trees, I got higher in the basin between Earl and Navaho Peaks and the views opened up, but the clouds also started to creep in. In the open the breeze made it quite chilly, so I put layers back on again. This was to become a recurring theme throughout the day.

Cloud drama 2014-05-17 08.10.34

I gained the saddle at 6050′ on the ridge between point 6658 and Navaho. One of the beauties of traveling in this area is that many of the ridges are sharp and the valleys are deep, so you are often greeted with with sudden, dramatic views, and the Stuart Range is among the more dramatic anywhere. 

I encountered two other hikers who, in spite of the 7 cars at the trailhead when I left and the other tracks in the basin, were the only other people I met on Navaho. The main ridge up to the summit was completely devoid of snow, so I stayed to the NW side of the main ridge and ascended a wide, heavily treed SW-facing gully where I found some old snow machine tracks!? To stay on snow as high as possible, I circled to the NW to about 50′ below the summit rock pile, where I ditched the skis and scrambled up to tag the summit, joining the hikers who had beaten me up the ridge.

2014-05-17 10.00.32

Panorama S to N (L-R)

From the summit I scoped out my descent options. I could retrace my steps and get a fine ski back to camp, or there is a spectacular basin running NE from just below the summit. You can drop in from just E of the summit, or you can take a gentler run to the N then turn E down the same drainage.

NE Drop-in

Up to this point the weather had been changeable, but mostly cold, overcast, and breezy, so things were still pretty firm at 11am. I decided to wait in the shelter of some rocks where I left my skis to have a snack, and wait for conditions to soften up a little more. From both an avalanche and a skiing standpoint this is nearly ideal. You get solid, stable snow underneath, and a soft surface of corn snow perfect for turns. While I was waiting, the sun reappeared and it warmed up markedly, so I decided to get going before it got too soft. With the summit launch’s steeper pitch, firm show, and the fact I was solo, I decided to play it safe and ski 200′ down the gentler shoulder to the N then turn about 800′ down the same drainage. It turned out to be a perfectly enjoyable 30-40 degree descent in the best spring conditions I have skied in years! True hero snow!

NE Basin

Of course, in the backcountry whatever you ski down you have to skin back up, so I slogged back up to the 7000′ shoulder, reaching it at about 12:15. Meanwhile, it clouded up again, I took one more panorama of the Stuart Range, then headed down. I more-or-less retraced my route back to camp in warm, sunny conditions.

Stuart RangeThe ski down was still in great shape until about 5600′ where things started getting pretty wet and sloppy. I had to take my skis off at about 5200′ because things were melting out so fast. I packed up camp and headed back to the car, which in the very soft, discontinuous snow to 4000′ was kind of a death march.

It has been quite a while since I pushed myself that hard, with a day of 3,000+ ft of ascending and 5,000+ ft of descending, especially solo. A trip with my patrol partners would have likely been no less fun or challenging, but exploring a new place at my own pace – without the influence of others’ experience, opinions, and agendas – forced me to rely exclusively on my own judgement, reconnected me to my own own rhythms, and reconnected me with many reasons why I do this in the first place.

Route map as tracked by my GPS for May 17 is here: http://caltopo.com/map?id=574M

Posted in Outdoor Recreation, Skiing, Uncategorized, Winter Recreation | Tagged , , , , , , , , , | 1 Comment

Maps & Magnets in the GPS World

A quick post about backcountry navigation.

Most of us now have GPS, maps, and electronic compasses accessible in our phones. With solar charging options we can even overcome the battery issue for backcountry electronics. So what purpose does the traditional map and compass serve in our electronic world?

This video – while referring to vehicle navigation systems – has some relevant points. Here is my list of things that make it important to be able to work with maps and compass.

Malfunctions: The most obvious is that electronics can break or have software malfunctions or have display problems or any number of other technical issues.

Reception: A lot of things can affect the reliability and precision of GPS reception; trees, cloud cover, precipitation, terrain, etc.

Opportunity for human error: All it takes is entering one wrong digit in a long string of digits for you to go off in entirely the wrong direction.

Scale: This is really important. As James May says in the video, you can’t really see your place in the big picture. You can zoom electronic maps in and out, but if you zoom out you are limited by the display size, so you can’t read detail. Having a quick reference picture of what is around you without having to zoom and pan makes keeping yourself located and keeping your sense of direction tuned in.

Besides, looking at the map is a good excuse to take a rest.


Posted in Outdoor Recreation, Skiing, Winter Recreation | Tagged , , , , | Leave a comment

The Art of Running Away from Avalanches

Sounds like my kind of skier.

Mediocre Mountaineer

My friends and I took up backcountry skiing at the same time. A few years ago, as broke students we all simultaneously realized that we couldn’t afford resorts anymore. The burden of rent, tuition and the need to eat overpowered our desire to shell out a hundred plus dollars per day on a lift ticket.

When we took up backcountry skiing we were terrified. Fresh out of avalanche safety training, we made our way to the slopes and realized that the strongest lesson we had learned, is that we knew nothing. Nothing.

We have since grown as backcountry skiers, and along with this growth came the development of a risk-reward balance. The more we began to understand.  We have grown more accustomed to the risks and developed our own balances between risk and reward. The group I have chosen to ski with though varied in our skill level and personalities…

View original post 359 more words

Posted in Outdoor Recreation, Skiing, Winter Recreation | Tagged , | Leave a comment

Reawakening my inner Nordic

I have recently been rediscovering my inner Nordic skier, which has been slumbering for many years. Ski tours this winter in Leavenworth, Blewett Pass, and Snoqualmie Pass – including one beautiful day introducing  my 8 year-old son to what we used to call cross-country skiing – represent more classic touring than I have done in years. The simplicity of just moving across the countryside on light-weight gear allows me to focus on movement, rhythm, and accumulating mileage rather than vertical; enjoying the tour, rather than the turn.

S’s first cross country ski tour not in a pack

As a boy growing up in semi-rural western Massachusetts I grew up skiing both alpine and cross-country.  I had the extraordinary benefit of having corn fields around my house, so I was able to ski out my back door whenever there was enough snow. As a teenager we moved to the hills and woods where I could explore even farther. Track skiing was a rarity at home, but on family trips to Colorado or northern New England we would ski at the nordic resorts. I was always trying to ski faster, sometimes imagining a cross country race the way other kids imagine a football game.

When I was in college, my dad and I took a trip to a hut on the 10th Mountain Trail in the Colorado high country. The gear was typical for the time – which is to say terrible – but we shared space with a guided group and played around on slopes near the hut. From that point I rarely skied cross-country and my focus turned to telemarking and peak touring. I soon moved to the Northwest where I skied some of the standards: Mount Saint Helens and Mount Adams as well as some moderate tours in the Central and North Cascades.

I enjoy a challenging adventure and the aesthetics of leaving fresh tracks – and not just a few sitzmarks – in the backcountry but I have never been a real adrenaline junkie. With a busy family life I often just want to explore new areas, visit places for their beauty or solitude; where turns are more of a bonus or a pleasant side-effect rather than the goal. On my tours I sometimes feel the payoff of moving lighter, faster, and farther is greater than the modest descent.

My patrol always provides course support for races at a local public-access nordic ski area. We ski out on the course with our patrol packs, hang out at one location for a while and watch the racers go by. On the longer races we rotate positions periodically during the race to stay warm. For someone like myself – who as a kid, inspired by images of Bill Koch, would roll up his stretch ski pants like knickers and treat every outing like a time trial –  slogging along while the racers flew by became torture.

This season I decided to return to my my roots (a few technological advances not withstanding). I got  my first ever NNN set-up and have spent the season embracing my inner kick-and-glider. Even while carrying a patrol pack, the relative weightlessness, speed, and sound – specifically the lack of it – feel familiar and comfortable. It has been like a little recreational homecoming.

Posted in Skiing, Uncategorized, Winter Recreation | Tagged , , , | 1 Comment